THE HEIGHTMARK GUIDE
How to compare your elevations with Mount Fuji and Everest
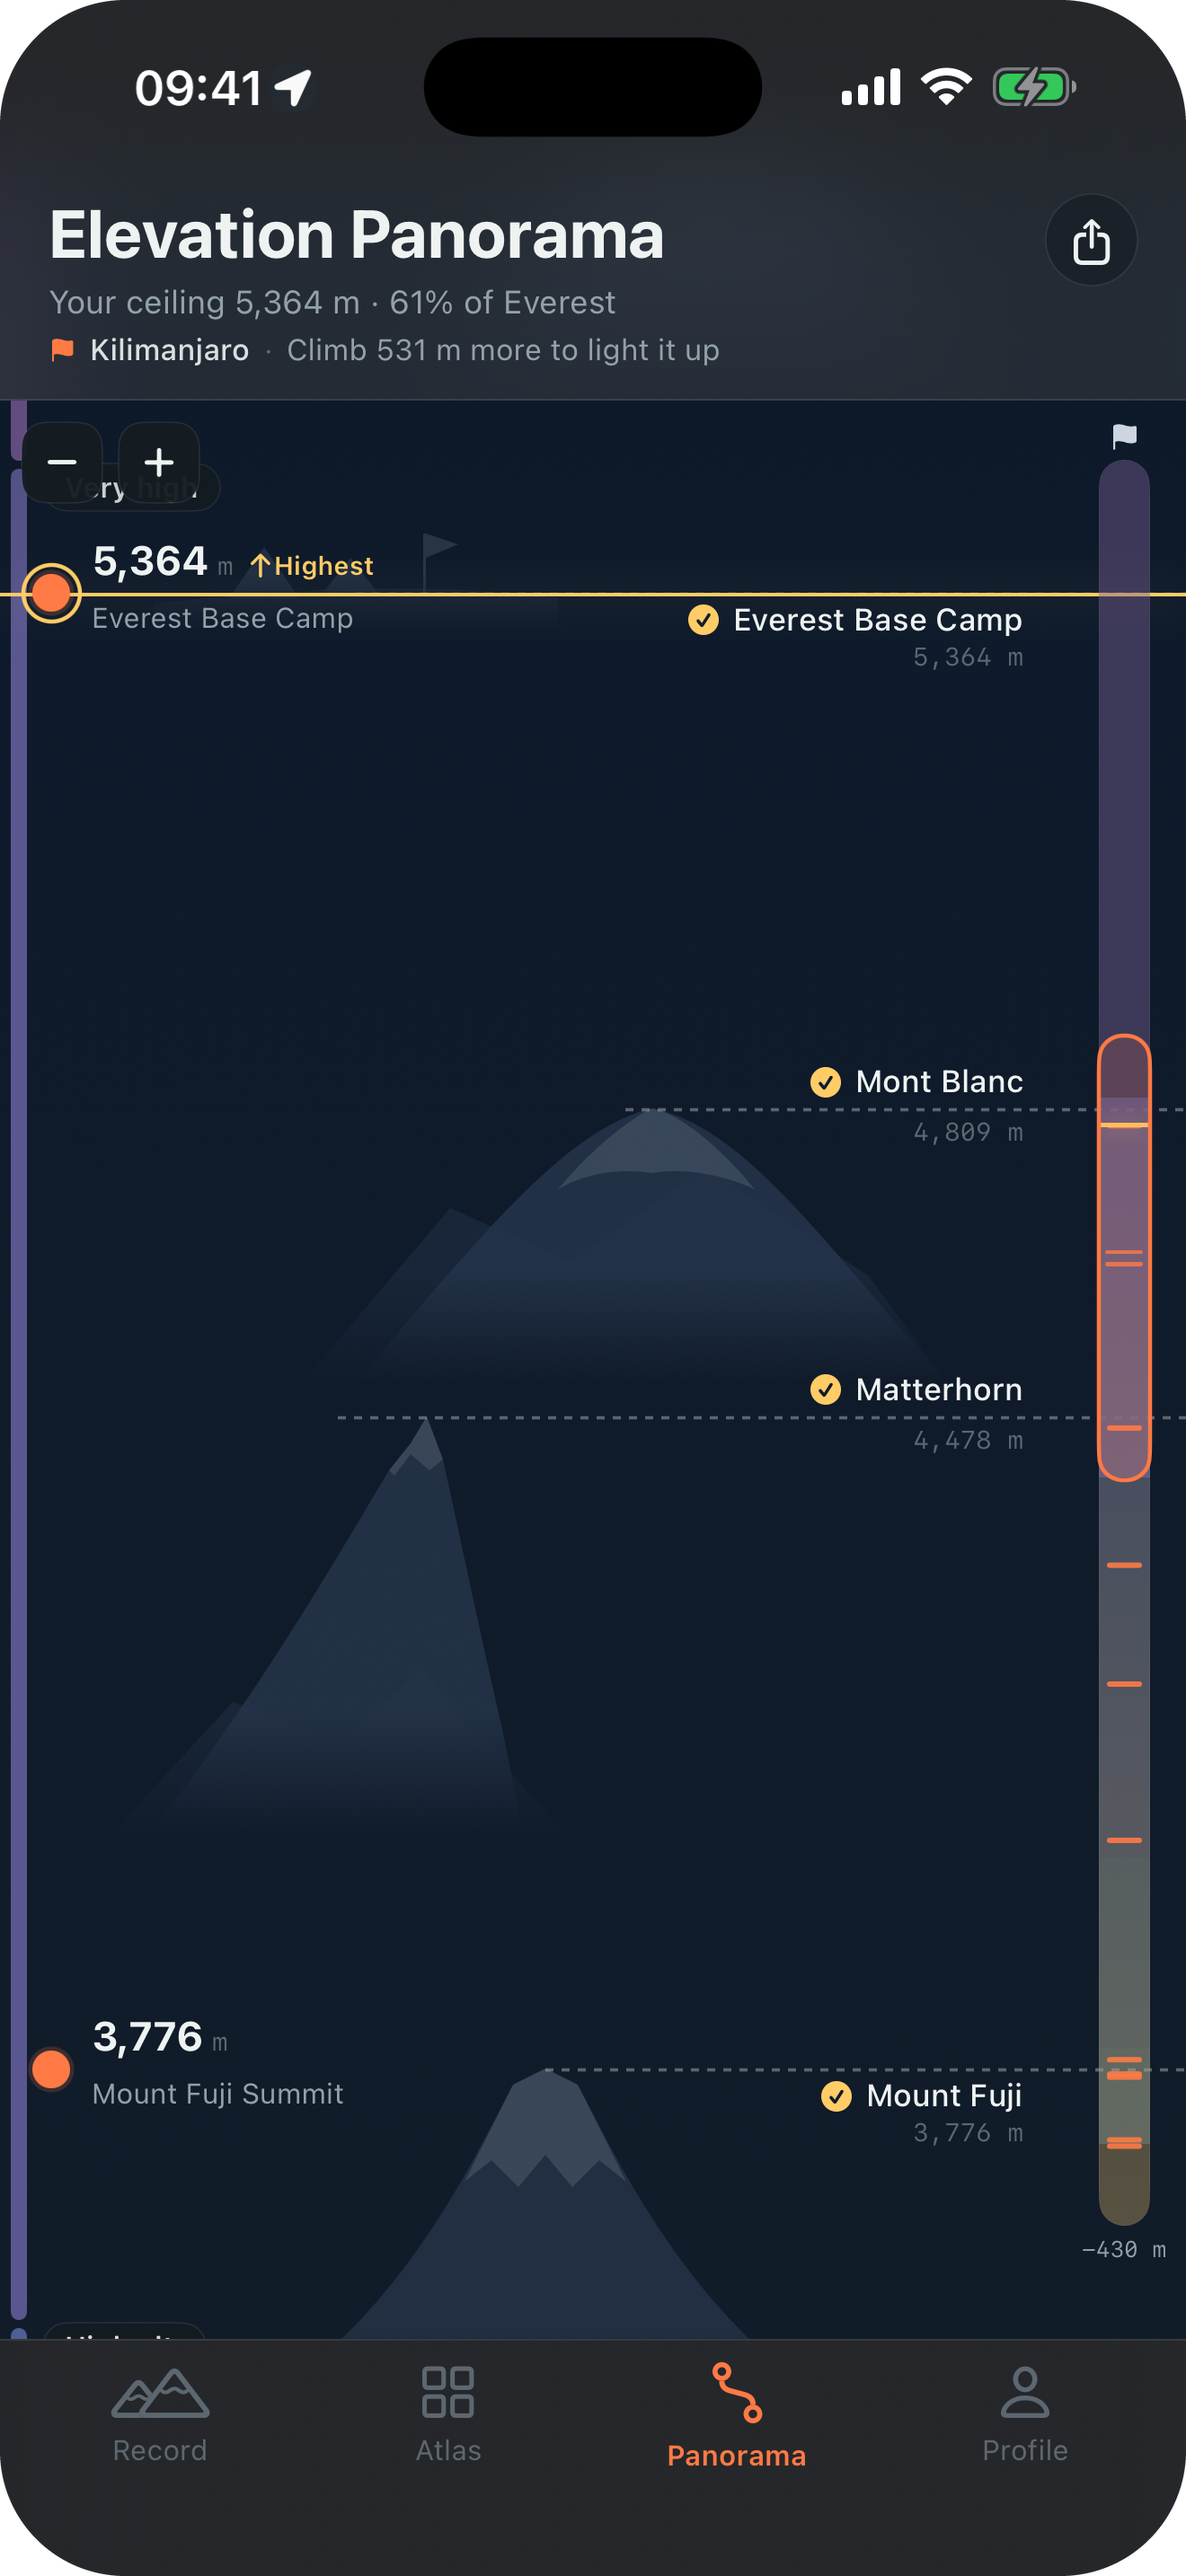
Heightmark’s Elevation Panorama places your saved marks and world landmarks on one vertical scale. Open Panorama after saving a place, then scroll or zoom to compare its elevation with Mount Fuji, Everest, and other references.
Step by step
Save a place first
Record an elevation where you stand, or import an original photo with coordinates, elevation, and capture time. Save the result as a mark.
Look at both sides of the scale
Open Panorama. Your personal marks appear on the left and reference landmarks on the right. Both use the same vertical scale.
Zoom to the heights you want to compare
Use pinch or the zoom controls, then scroll to a reference such as Mount Fuji. Change between meters and feet in Settings.
Keep a view of the collection
Use Panorama’s share action to export a tall image of the collection. You can also make a card for an individual place.
What does a 3,000-meter place mean on this scale?
Mount Fuji is shown at 3,776 m and Everest at 8,849 m in Heightmark. A mark at 3,000 m sits 776 m below the Fuji reference. This is a difference between elevations, not the climbing distance or elevation gain of a route.
Start your elevation journal
Recording is free. Up to 10 marks can be in your Atlas; additional marks remain saved in Not in Atlas. Optional, one-time Heightmark Pro adds every mark to your Atlas and Panorama and unlocks premium sharing templates.
Download on the App Store